Monday, May 31, 2010


I forgot to mention I made a strap for the book cover. Did it this way so that the extra bookmarks and prayer cards won't fall out. I also sew 4 rows of decorative stitches in the middle of the book cover. This is to separate the two pockets. The strap is sewed on the inside of the back pocket. Finally~!~ My Bible has a cover!!!

Thursday, May 27, 2010


I have layered the fabric accordingly....starting from the bottom....1. Plain beige fabric (Omit this if you are not making the pockets) 2. Put the printed fabric right side up (This is the cover as well as the pockets for top and bottom of the book) 3. Two pieces of beige fabric for the book sleeves 4. Plain beige fabric for the cover behind the sleeves.

When sewing round the edges, leave a 2 inch (more if you like!) gap so that you can turn the fabric inside out.

Wednesday, May 26, 2010


This printed fabric will be the front and back pockets of the Bible cover. I like to have a place to keep bookmarks and prayer cards instead of putting them in between the pages.
I have been going out with my friend, Haminah, for some embroidery lessons! She just bought a Janome Memory Craft 350E embroidery machine. I like the idea of combining patchwork, embroidery and applique! Beautiful!!! Maybe if I wished hard enough I might get one too!!! Woohooo!!!

Tuesday, May 25, 2010

Book cover

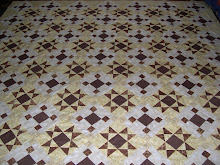
I found this quilted remnant fabric my sister gave me some years ago and decided to use it to make a book cover for my Bible. I wanted to use it to make mittens for my kitchen but somehow never got round to doing it!
LOL!!! The printed fabric is for the pocket on the front and back of the Bible.

Sunday, May 23, 2010


This is my doll all done up!! Added a ribbon on her hair and a little hat on her hand. I took this picture of the doll sitting on my Juki sewing machine!! This doll can sit anywhere!! LOL

Friday, May 21, 2010


I sewed two buttons for the eyes and glued a piece of red fabric for the nose. Chain stitched some stitches for the mouth. I took quite some time to make the hair! This is because I had to split some yarn into two then used six strands to make one braid! I had to make quite a few braids. This is how I sewed the first braid on.. leaving the ends as it is.
I wanted to use thicker yarn but in this town where I live... things are quite limited here! The thicker yarn don't come in the color I wanted so I had to make do with whatever I can find! LOL

Thursday, May 20, 2010


Added lace on the dress. Then I decided to paint the shoe black. I think I should have done it before I put the dress and the pants on the doll. LOL

Wednesday, May 19, 2010


LOL My poor doll looked naked so I decided to make the dress first instead of the face! I also made the pants with some gathers at the hem for the it.

Just some update on my sewing room. The 6ft folding table arrived yesterday. I moved the 4ft folding table out into the TV room. After joining the two tables, I found out that I need to move the TV just a little bit more but I can't do it because the writing desk is next to it. I need some muscles to help me move them! So that's that for the day!! I then decided to make a book cover for my Bible! I wanted to do that for a quite a while and have been putting it off! Now's a good time!!

Tuesday, May 18, 2010


I've added two pieces of fabric onto the legs to join it to the body. It was a bit too short for my liking. Notice how nicely the doll sits on the table. That is the reason why I decided to use a block of wood for the body. The fabric over the wood makes it easier for me to attached the arms, legs, hands and head!

Monday, May 17, 2010


WOW! Time just flew by!! I saw my last blog and it was on Tuesday!!
arrggghhh!!!

I used running stitches to attach the doll's head to the body. Got to make sure that the head is upright and not drooping down.

Tuesday, May 11, 2010


First I sew the arms on the body. After that, the head goes on top. I did it like that so that I can adjust the head easily when I attach it to the body.

Friday, May 7, 2010


I used cotton to stuff the head, hands and legs. Made a small bag for the body to cover the piece of wood. As you can see, I didn't stuff the cotton all the way to the end. I left enough fabric to attach the parts together.


Wednesday, May 5, 2010


I drew the patterns on the calico by free hand. This is because I made some modification. All the patterns in the book are for dolls with fibrefill or cotton stuffing . I decided I wanted my doll to be able to sit upright properly so I will be using a block of wood for the body.

Tuesday, May 4, 2010

Country Doll


I bought a book on dolls and thought I will try and make one. Got the book from the Chinese Section at Popular book store. Sad to say, I can't read Chinese but...there are step by step pictures on how to make a doll! LOL The first thing to do is to dye the calico in tea bags!!! If you want the doll to smell good, use flavored tea!! I supposed if you want the doll to have a darker shade, you might want to use more tea bags!! LOL

Monday, May 3, 2010


The table and Hi-fi stand have been removed from the tv room. I'll move the quilting table there tomorrow. Then I'll try and get this quilted. I didn't realize the color combination would be this bright!! LOL

Sunday, May 2, 2010


No, I haven't move into my sewing room yet!! Hopefully by this week!! I am still doing my work in the tv room! LOL

I've finished sewing all the blocks. In the process of adding sashing and border. Actually I didn't want to add sashing but three blocks in a row is a bit too small. So I added 2" sashing around the blocks.